


What is IP camera?
An IP camera is a networked digital video camera that transmits data over a Fast Ethernet link. IP cameras (also called "network cameras") are most often used for IP surveillance, a digitized and networked version of closed-circuit television (CCTV).
An Internet Protocol camera, or IP camera, is a type of digital video camera commonly employed for surveillance, and which, unlike analog closed-circuit television (CCTV) cameras, can send and receive data via a computer network and the Internet. Although most cameras that do this are webcams, the term IP camera or netcam is usually applied only to those used for surveillance that can be directly accessed over a network connection.
Some IP cameras require support of a central network video recorder (NVR) to handle the recording, video and alarm management. Others are able to operate in a decentralized manner with no NVR needed, as the camera is able to record directly to any local or remote storage media. The first centralized IP camera was Axis Neteye 200, released in 1996 by Axis Communications.
 |
| IP Dome Camera |
- Remote administration from any location.
- Digital zoom.
- The ability to easily send images and video anywhere with an Internet connection.
- Progressive scanning, which enables better quality images extracted from the video, especially for moving targets.
- Adjustable frame rates and resolution to meet specific needs.
- Two-way communication.
- The ability to send alerts if suspicious activity is detected.
- Lower cabling requirements.
- Support for intelligent video.
Disadvantages of IP surveillance include greater complexity and bandwidth demands. One alternative for organizations with substantial investment in analog technology is to use a video server to, in effect, turn analog CCTV cameras to IP cameras. A video server is a small standalone server that converts analog signals to a digital format and provides the analog cameras with IP addresses.
Nevertheless, because it offers much more sophisticated capabilities, IP surveillance is increasingly replacing analog CCTV. An industry report from International Data Corporation (IDC) predicts that shipments of IP cameras and related products will increase 45% between 2009 and 2013.
 |
| IP Camera Diagram |
Setting up your IP camera surveillance system using an NVR with Two Ethernet Ports : -
The technology behind an IP security camera system is constantly evolving and there have been some nice improvements recently. Here at TechPro Security Products, we offer 3 types of systems including ones using IP cameras to provide the video. Although IP cameras may cost a bit more, they are also going to give you the highest resolution available on the market today. This article is going to explain how to set up this type of security camera system using a very useful configuration because some people are a bit intimidated by the networking involved.
There are several different ways that an IP surveillance camera system can be set up. This article is going to go over the type of set up which uses a NVR with two Ethernet ports. This configuration is great because it can be used to avoid putting an unnecessary bandwidth load on a network. All of the IP cameras that we carry give you megapixel quality video. The data involved in transmitting the video from even a one megapixel camera is fairly significant. If you are working with several of these cameras or ones that provide higher resolution (we now carry up to 12 megapixel cameras!) then transmitting all of that video will use an immense amount of bandwidth. This will cause the most common network to not function correctly. Not only can it cause the camera system to not work correctly, it will probably mean that nothing else will be able to use that network correctly. The solution to this is using the second Ethernet port to keep the data involved with the video transmission separated from the main network.
For the purposes of this article we’ll go over setting up a 64 channel NVR with 64 cameras using the dual Ethernet port method. This set up will require the following equipment.
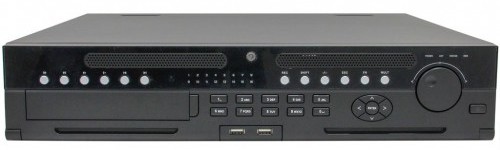
A 64 channel NVR (Model# NVR-ELHS-64-4K-DH)
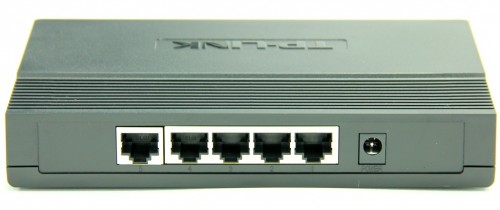
A simple gigabyte switch (Model# Switch-5G)
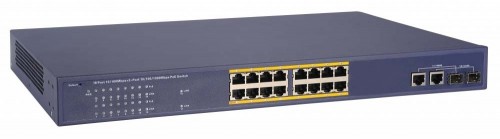
A 16 channel POE switch. (Model# POE-16MB2GP)
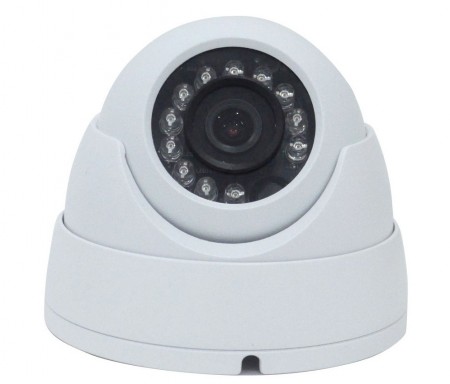
An IP camera. (Model# IPOD-EL3MPIR50)
The first step in this type of setup is putting together a temporary configuration so that you can initialize each camera (see Diagram 1). You will need to have a computer, a POE switch and the NVR (using Ethernet port 1) all connected to the same router. You will also need to make sure that you have the NVR’s Ethernet port 1 configured to work with your network.
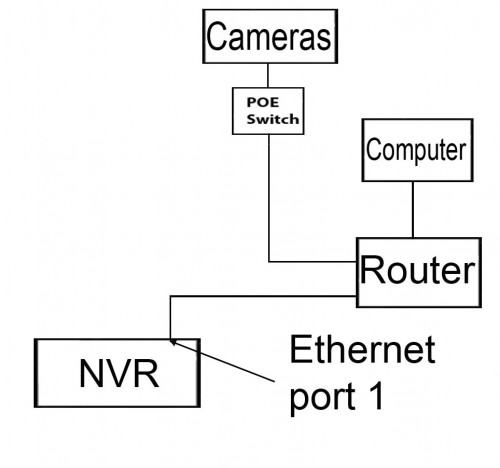
This layout will allow you to power each of the cameras and then log into them from the computer in order to get them set up to work with your NVR. The main thing you will need to do while logged into the camera will be to enable motion detection and assign the camera a unique IP address for the IP scheme that will be assigned to the NVR’s second Ethernet port. Changing the camera’s IP address is the last thing that you should do because you will not be able to access it from that computer once this change has been made and saved. There may be some other settings in the camera which will help to customize it for the application which you have planned for it. It’s also a good idea to label each camera with the IP address which you have assigned to it.
Once all of the cameras have been initialized, then they are ready to be set up in their final configuration (see Diagram 2). You will need to go to the network page of the NVR and choose “Multi-Address” from the drop down menu, this will allow each ethernet port to be set to a different IP scheme (for example – Ethernet port 1 can be set up to use the 192.168.1.1 scheme and Ethernet port 2 can be set up to use 10.1.1.1). This is a key feature in keeping the network which is handling the video transmission, from the cameras to the NVR, separate from the main network at the location.

At this point you should have Ethernet port 1 set to match the IP scheme of the main network, which will be used for remote connection. You should also have Ethernet port 2 set to a different IP scheme and all of your cameras set to unique IP address within that scheme (for example – Ethernet port 2 can be set to 10.1.1.1 and each camera would be set to 10.1.1.x, where x is unique to each camera).
The last step is to get each camera assigned to its own channel on the NVR. This is done by assigning the IP address from a camera to the particular channel which you want to associate with that camera’s live video feed and its recorded video footage. This will be accomplished through the ‘Remote’ page of the NVR using one of two different methods depending on the model of camera that you are using (see picture 1).
If the camera is one of our EL models (for example – IPOD-EL3MPIR50) then the NVR will detect it through the ‘Remote’ page of the NVR’s menu system. Clicking on the ‘Device Search’ button will get the NVR to list any network devices which it can detect. Once that you can see that the camera has been detected then all you have to do is put a check mark next to the camera’s IP address and click on the ‘ADD’ button.
If the camera you are using is any other type then you will need to manually add it to the NVR. To do this you will first need to click on the ‘Manual Add’ button. Next, you will need to enter the camera’s IP address, user name, password and the ports that it is using for video transmission.
What is the difference between IP and CCTV cameras?
OVERVIEW
Security cameras come in two distinct types, Digital(IP) and Analog(AHD, TVL, TVI, HD-SDI, HD-CVI). Many types of these security cameras are still widely in use. However the security camera industry continues to push the limits of resolutions and as a result, the use of digital IP security equipment continues to increase while analog continues to decline. Let’s take a look at the general differences in analog surveillance cameras and IP surveillance cameras.

RJ-59 Cable Ends-Security Camera
Analog Security Cameras
1. Analog cameras send a video signal to an encoder(DVR) which then processes the signal and records it.
2. Analog cameras require a direct connection to the DVR.
3. Analog security cameras require two cables, one for power and one for video.
4. Analog cameras have a limited platform of resolutions available.
2. Analog cameras require a direct connection to the DVR.
3. Analog security cameras require two cables, one for power and one for video.
4. Analog cameras have a limited platform of resolutions available.

Cat5e and Cat6 can be used for IP cameras
IP Security Cameras
1. IP Cameras encode the video signal at the camera and send the video to Network Video Recorder(NVR) through internet protocol(IP).
2. IP cameras require a connection to the same network as the NVR, and doesn’t have to be directly connected to the recorder.
3. IP Security cameras use Power over Ethernet(PoE) which means you only have one cable going to the camera that supplies power and transfers video.
4.The worst IP camera resolutions are far superior to the best analog resolutions.
IP SURVEILLANCE CAMERAS
IP security cameras have impressive resolutions and an ever evolving technologies. IP cams have introduced some of the biggest changes in the security world with their crystal clear 4k resolutions and smart video analytics. If your buying a security system for the first time or upgrading an existing one you should definitely consider using an IP security camera system. It has many benefits over analog and the overall install is easier compared to conventional security surveillance systems.Typical IP Resolutions in Pixels:
1920 x 1080 (2 Megapixels) 1080P HD
2688 x 1520 (4 Megapixels) HD+
3840 x 2160 (8 Megapixels) 4K+
1920 x 1080 (2 Megapixels) 1080P HD
2688 x 1520 (4 Megapixels) HD+
3840 x 2160 (8 Megapixels) 4K+
Expect IP security cameras have minimum resolution of 1080P.


No comments:
Post a Comment